Connection Menu
Please read the plugin documentation beforehand.
Examples are available for each compatible version of Unreal Engine in the Plugin Sample repository
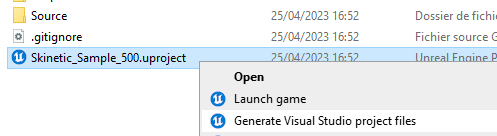
Before launching any example, the project source files must be regenerated to allow Unreal to place the plugin DLLs in the right place (or it will crash when the example is played).
To do this :
In Windows Content Explorer, right-click on the .uproject file and select Generate Visual Studio Project Files.
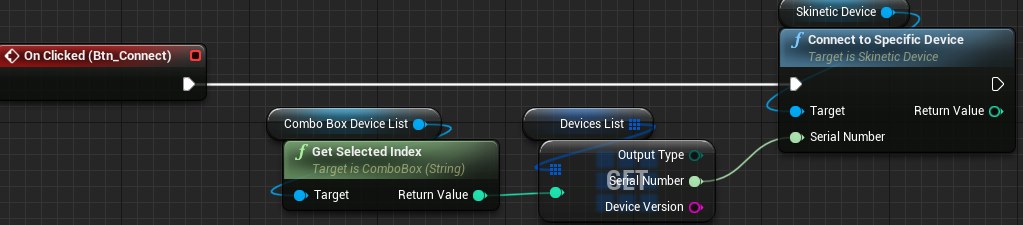
The “3_ConnectionMenu” level is an example of a menu allowing the user to choose which Skinetic Device to connect to. It consists of a Widget Blueprint containing 2 comboboxes, a text display and 2 buttons.
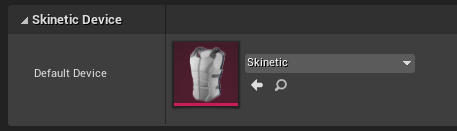
As in any of the examples, a Skinetic Device Data Asset is created and set as default device in Project Settings > Plugins > Skinetic.
GetDefaultDevicenode is called on initialization to retrieve a reference to the Skinetic Device Asset. It is stored as a variable.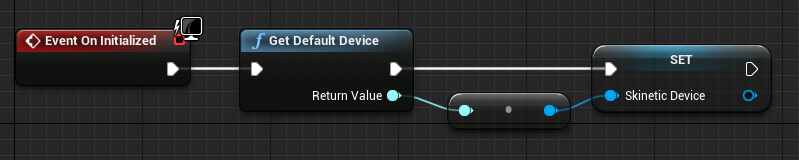
On the Construction Event, the combobox “Connection type” is filled with each value of the
OutputTypeenum.When the button Scan is clicked, it takes the connection type selected on the combobox, sets it as the preferred connection in the Skinetic Device and launches the internal scanning routine to establish a list of available devices.


The scan is considered complete when its status is 0 (finished) or negative (an error occured).
When the scan is completed, a message is displayed if an error has occurred, otherwise the combobox is filled with the Serial Number of all available devices and the Connect button is enabled. (See function
Enable Device Selection)When clicked, the Connect button takes the selected Serial Number and calls the
ConnectToSpecificDevicenode with it as a parameter.