Design Haptics with Unitouch Studio
This manual will guide you through the different features available in Unitouch Studio 1.5.0.
Sequence Creation
Create a new Sequence
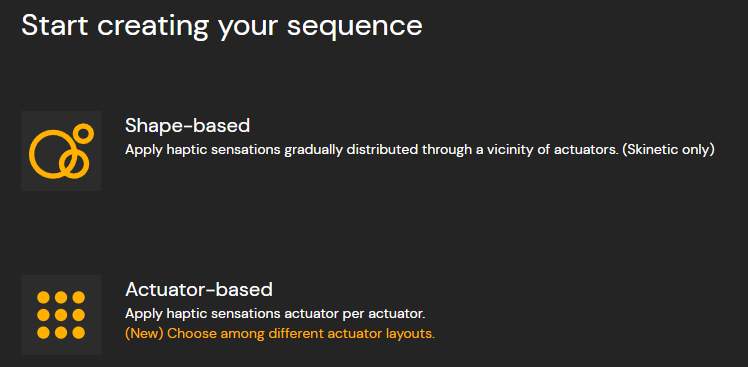
Unitouch Studio allows you to easily design high-definition haptic sequences for your next-gen productions. To do so, two modes of design are available:
- Shape-based: Design your sequence through the motion of 3D shapes.
- Actuator-based: Design your sequence by modulating sensations levels actuator per actuator.
Sensations
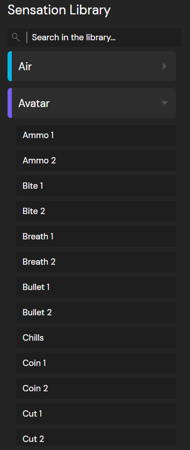
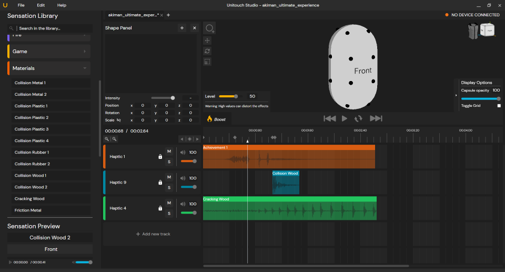
Dive into our Sensations library
Unitouch Studio integrates a tailored collection of haptic sensations that you can look up, preview, and add to your design.

You can select the location to preview the sensation (front, back, or sides) and use the play button in the sensation preview panel located at the bottom of the sensation library to start or stop it.

You can now show and hide the sensation library to optimize your workspace.

Add a sensation
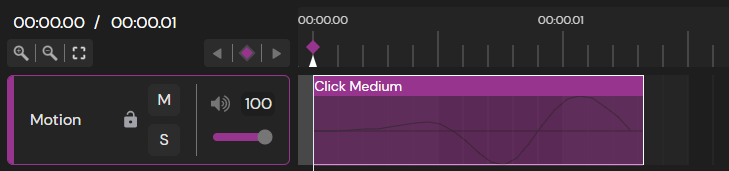
From the sensation library, you can drag and drop a sensation over the timeline. By default, a sensation contains a keyframe at the beginning of the sensation.
The content of the default keyframe varies for both spatialization modes:
- Actuator-based: The sensation is applied to all the actuators.
- Shape-based: The sensation contains a default shape.
Copy/pasting a sensation
You can easily duplicate a sensation on your timeline by copying and pasting it, it will also duplicate its content (volume envelope and keyframes).
Moving a sensation
You can move a sensation by selecting it and dragging it across the timeline. It can be “drop” wherever on the timeline as long as the sensation does not overlap with another one on the same track.
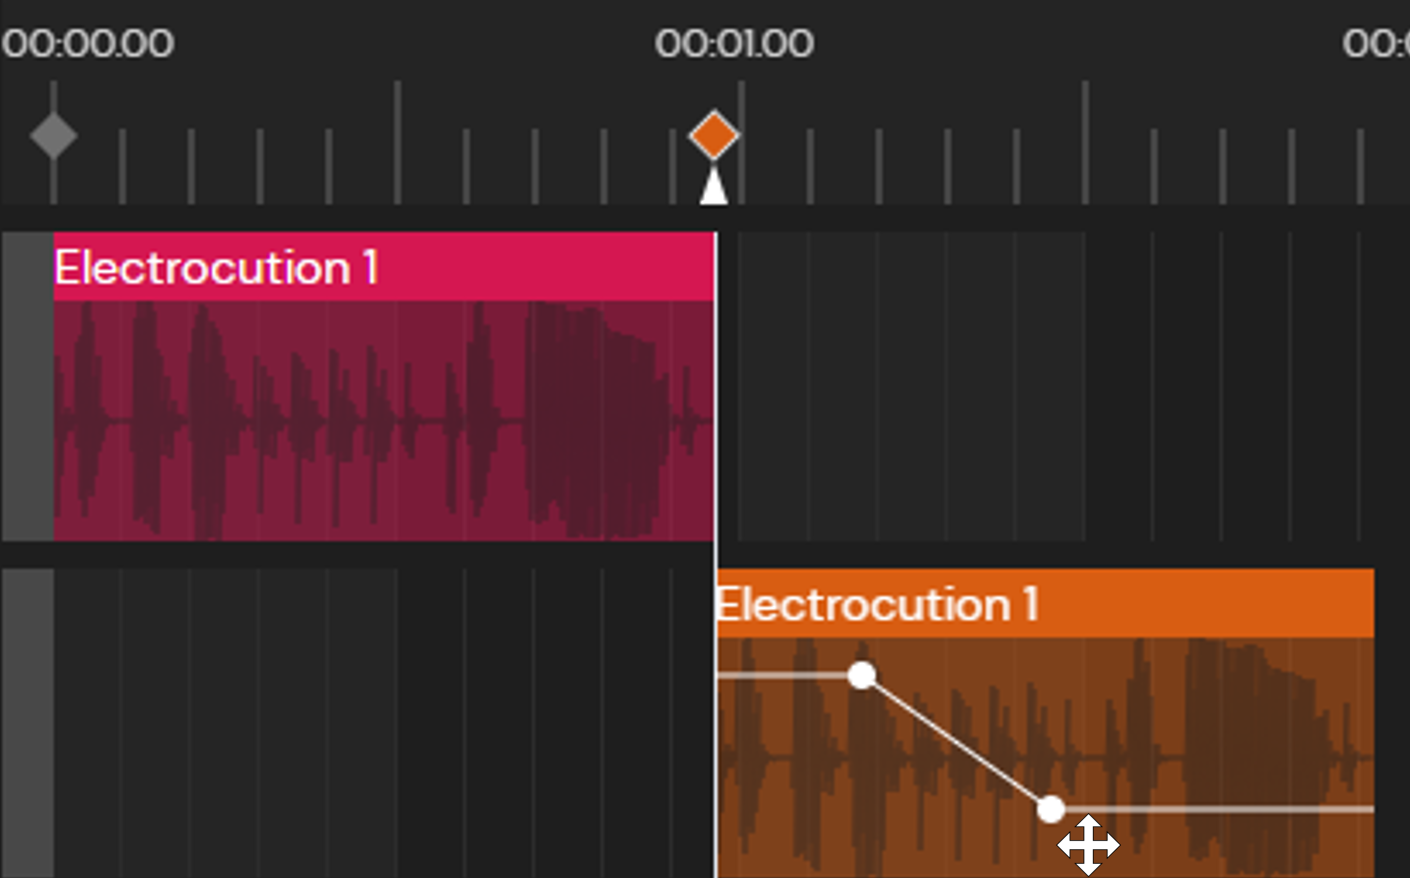
Add a keyframe
To vary the spatialization of the effect over the time, you can add keyframes over a sensation, which will adjust the where the effect is applied.
This can be done by clicking over the Add keyframe button (Highlighted in yellow). The position of the keyframe will depend on the position of the playback head.
Crop a sensation
You’re looking to only use a segment of a sensation from our library ? Then you can easily crop its beginning and/or end to keep what you want. Be sure to select the sample and then go lateral borders to active the crop cursor.

Pitch Shift
You can modify your integrated sensations to your preference by pitch shifting them, a modification of both the temporal and spectral aspects of a sensation, the shorter the higher and the longer the lower.
Once the sample is selected, pitch shifting can be achieved by holding the "Shift" key, selecting the extremity of the sensation on the timeline, and dragging it one way or the other.


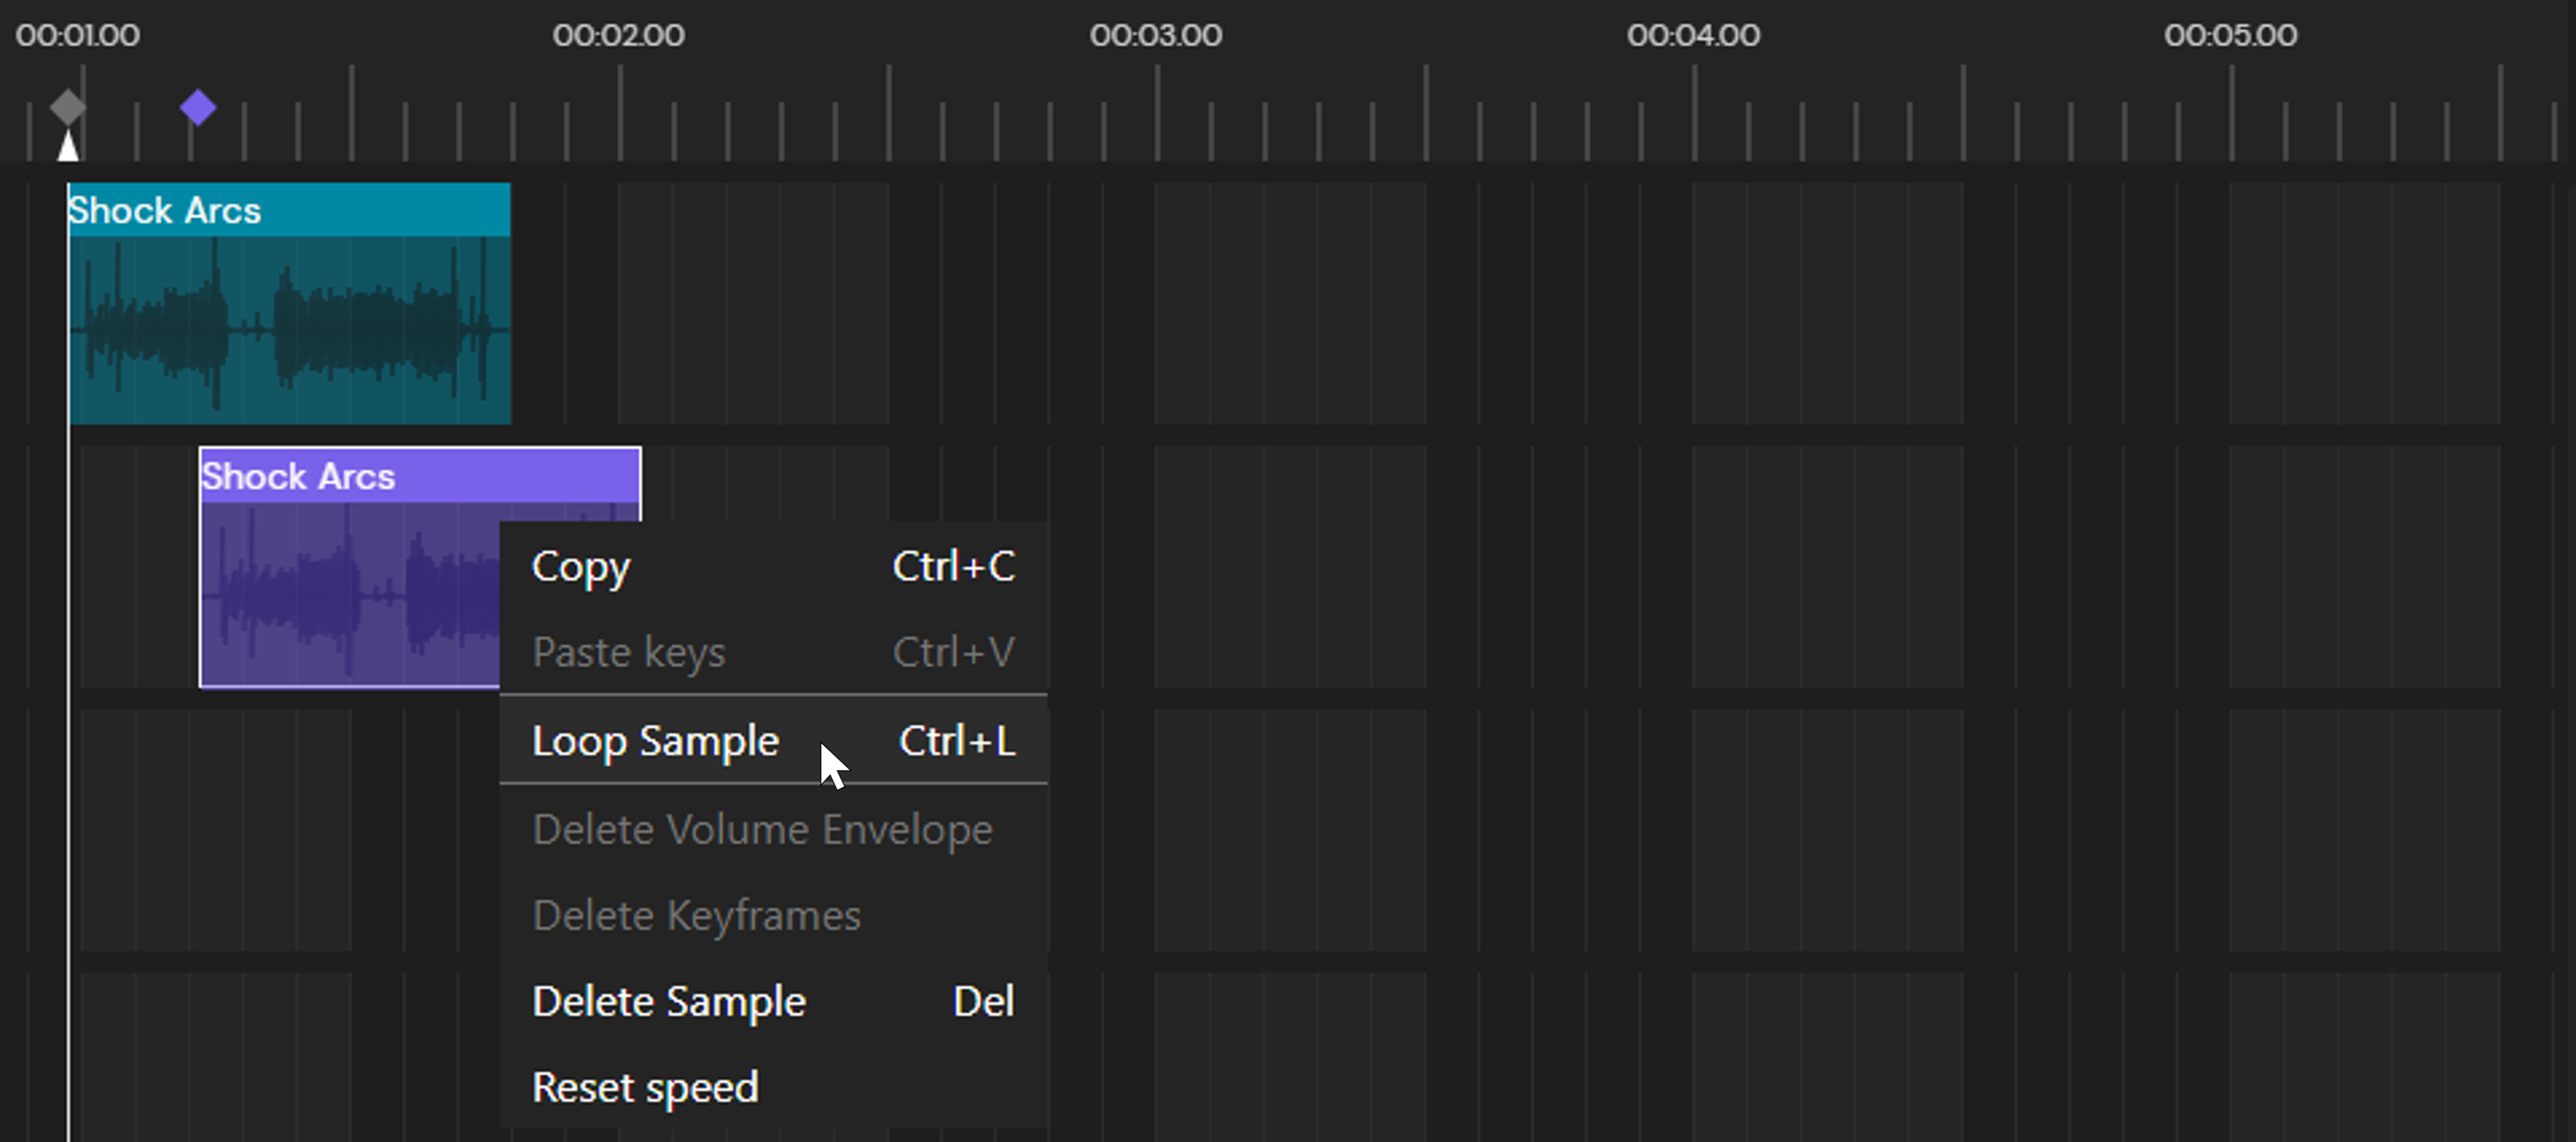
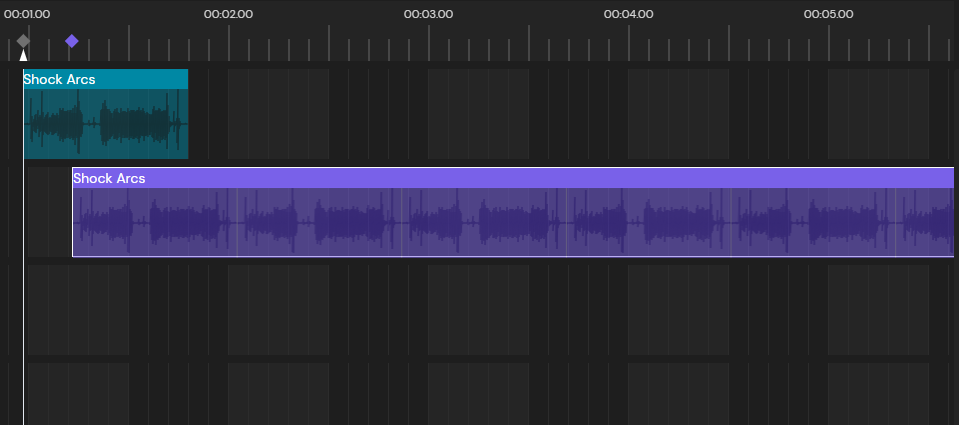
Repeat a sensation
You can repeat a sensation by holding down "Ctrl," grabbing the end of the sensation on the timeline, and dragging it to the desired number of repetitions.
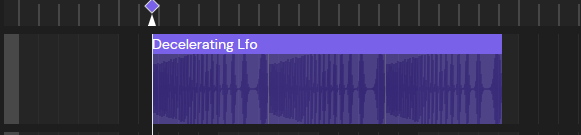
Looping a sensation
In your design, you can set a sensation to be played indefinitely by looping it. Simple select a sensation and loop it. Note that when using such sequence with the SDK, you’ll have to stop it manually from a command. Additionally in your sensation, you can modify its volume with an envelope.
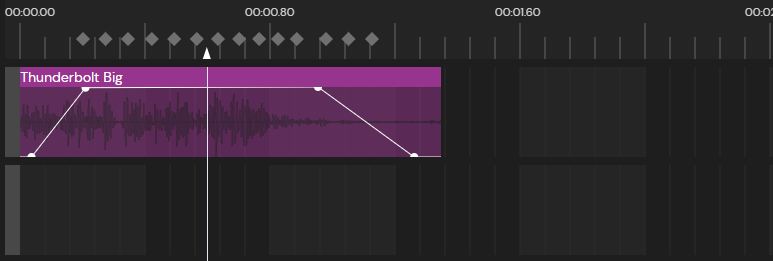
Volume and intensity
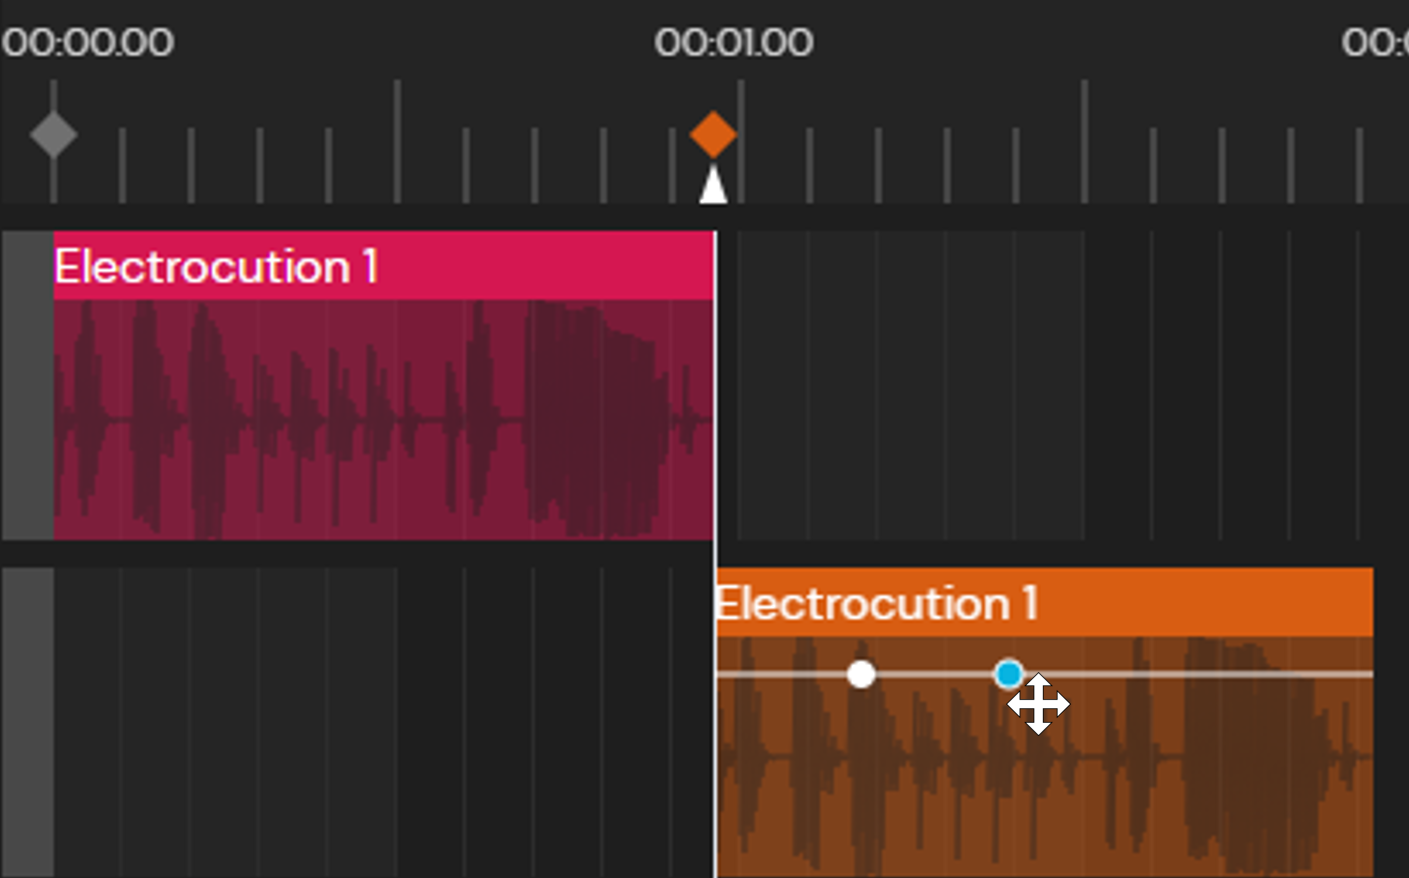
Add a volume envelope
You can adjust the volume evolution of a sensation through volume envelopes. It can be added by simply clicking on the center of a sensation, and adjust the volume vertically, and the time horizontally.
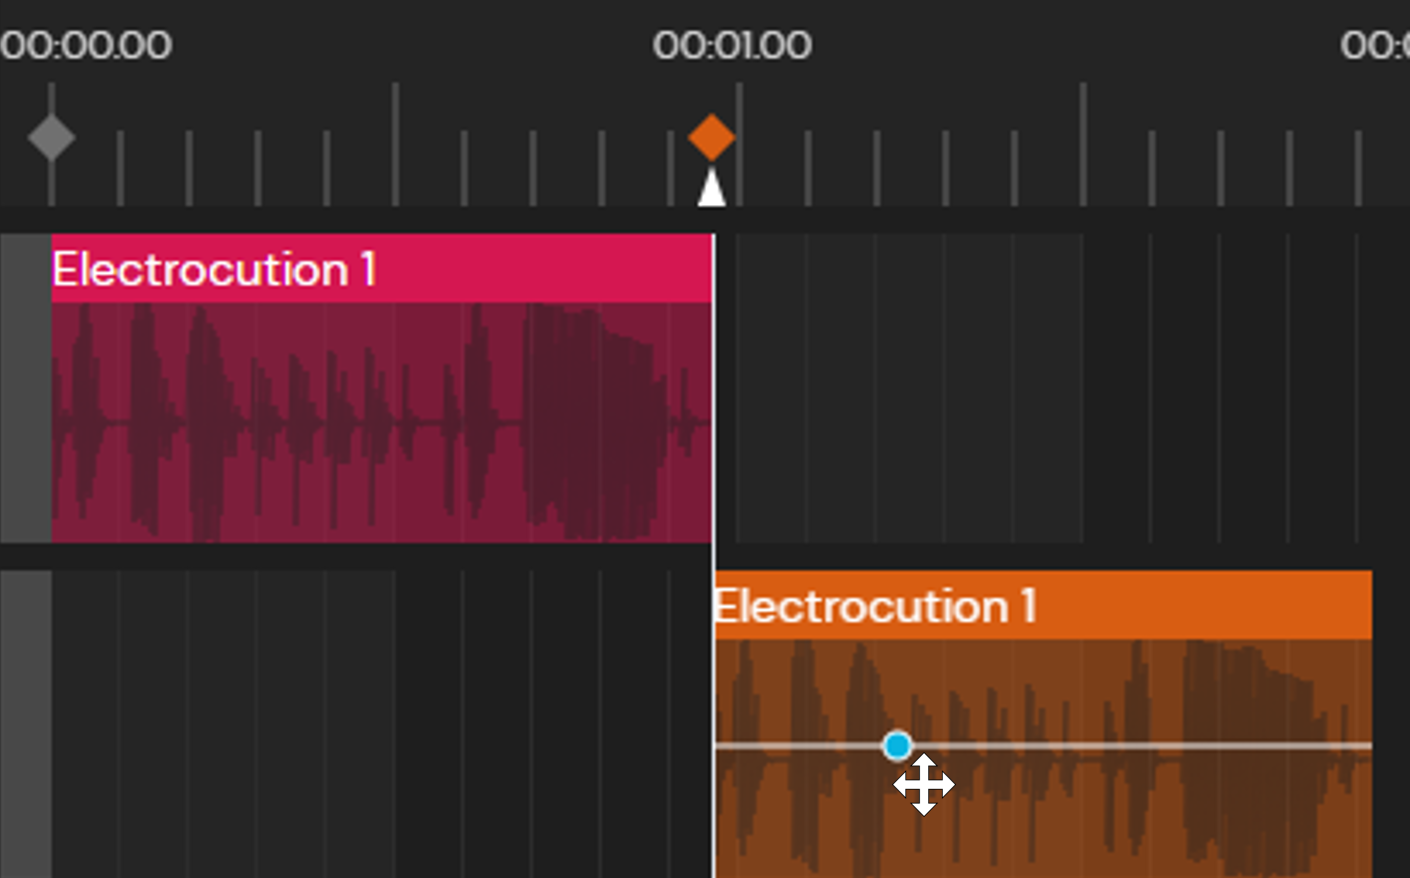
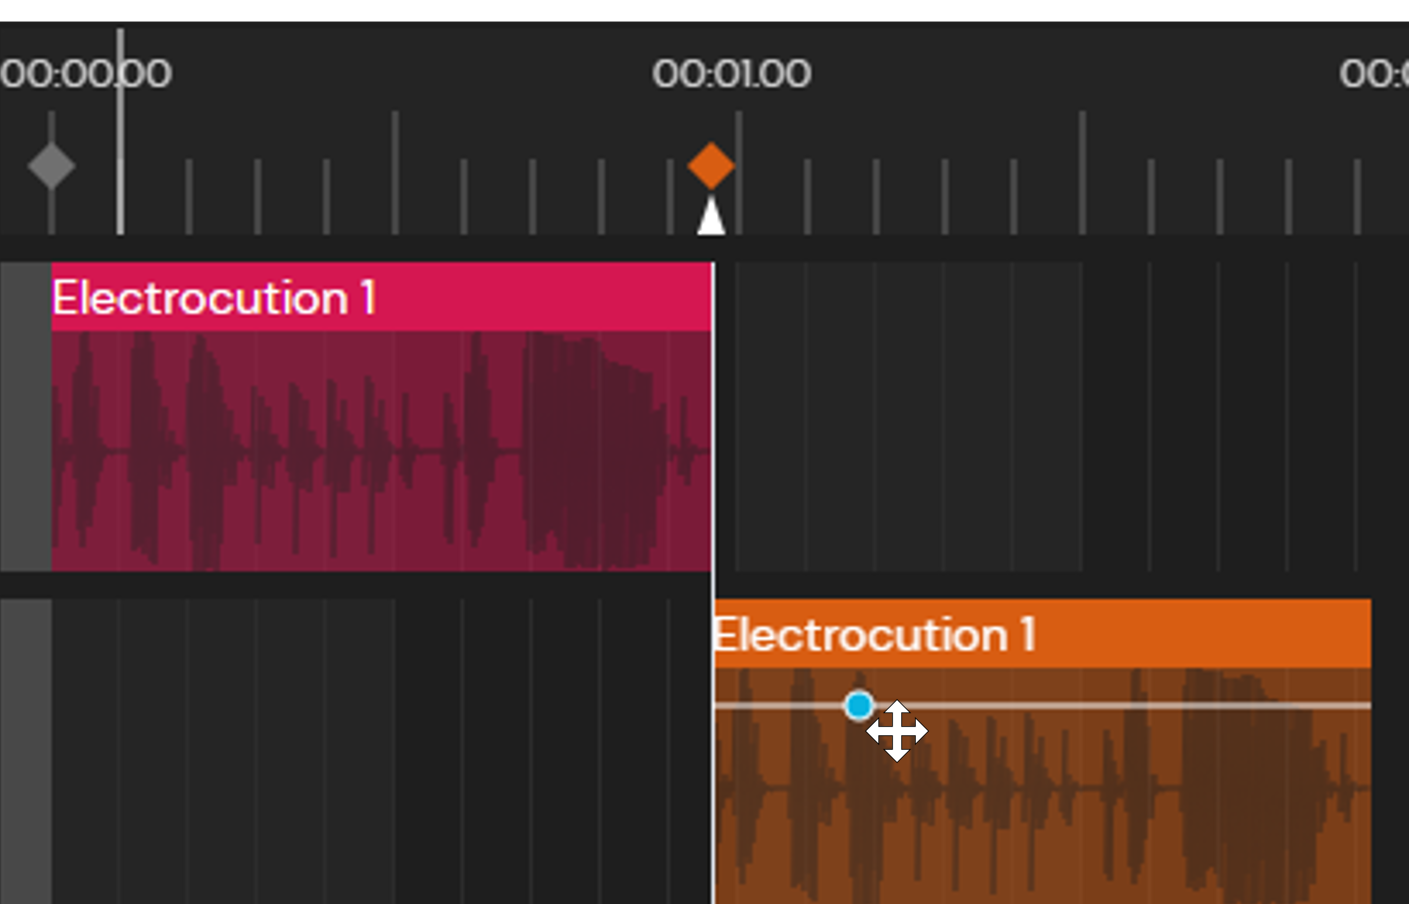
Adjust waypoint
The waypoints of the volume envelope of a track can be modified by clicking over them and then holding left mouse button while dragging the waypoint.
The waypoints of the volume envelope of a track can be deleted by pressing the Delete and/or Backspace key when they are selected.
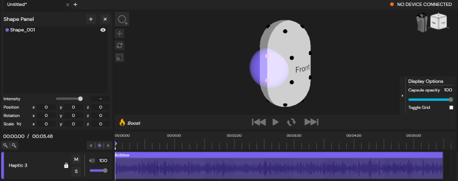
Spatialization with Shapes
Add a Shape
You can add a shape by clicking on the add shape button located in the viewport and also in the Shape panel. A new shape will be added with its default values.
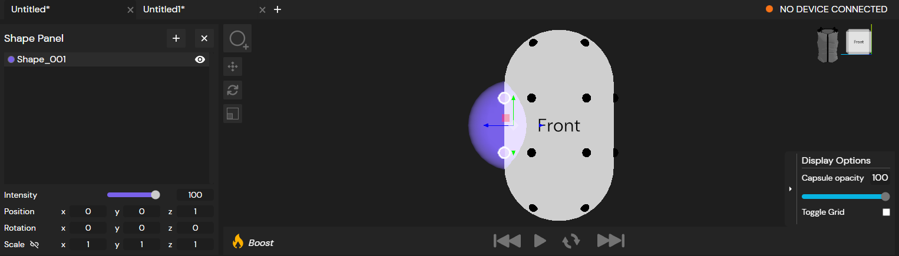
Set shape intensity
Each shape has an intensity level that can be set in the design, it will modify how wide within the sphere the sensation is applied.

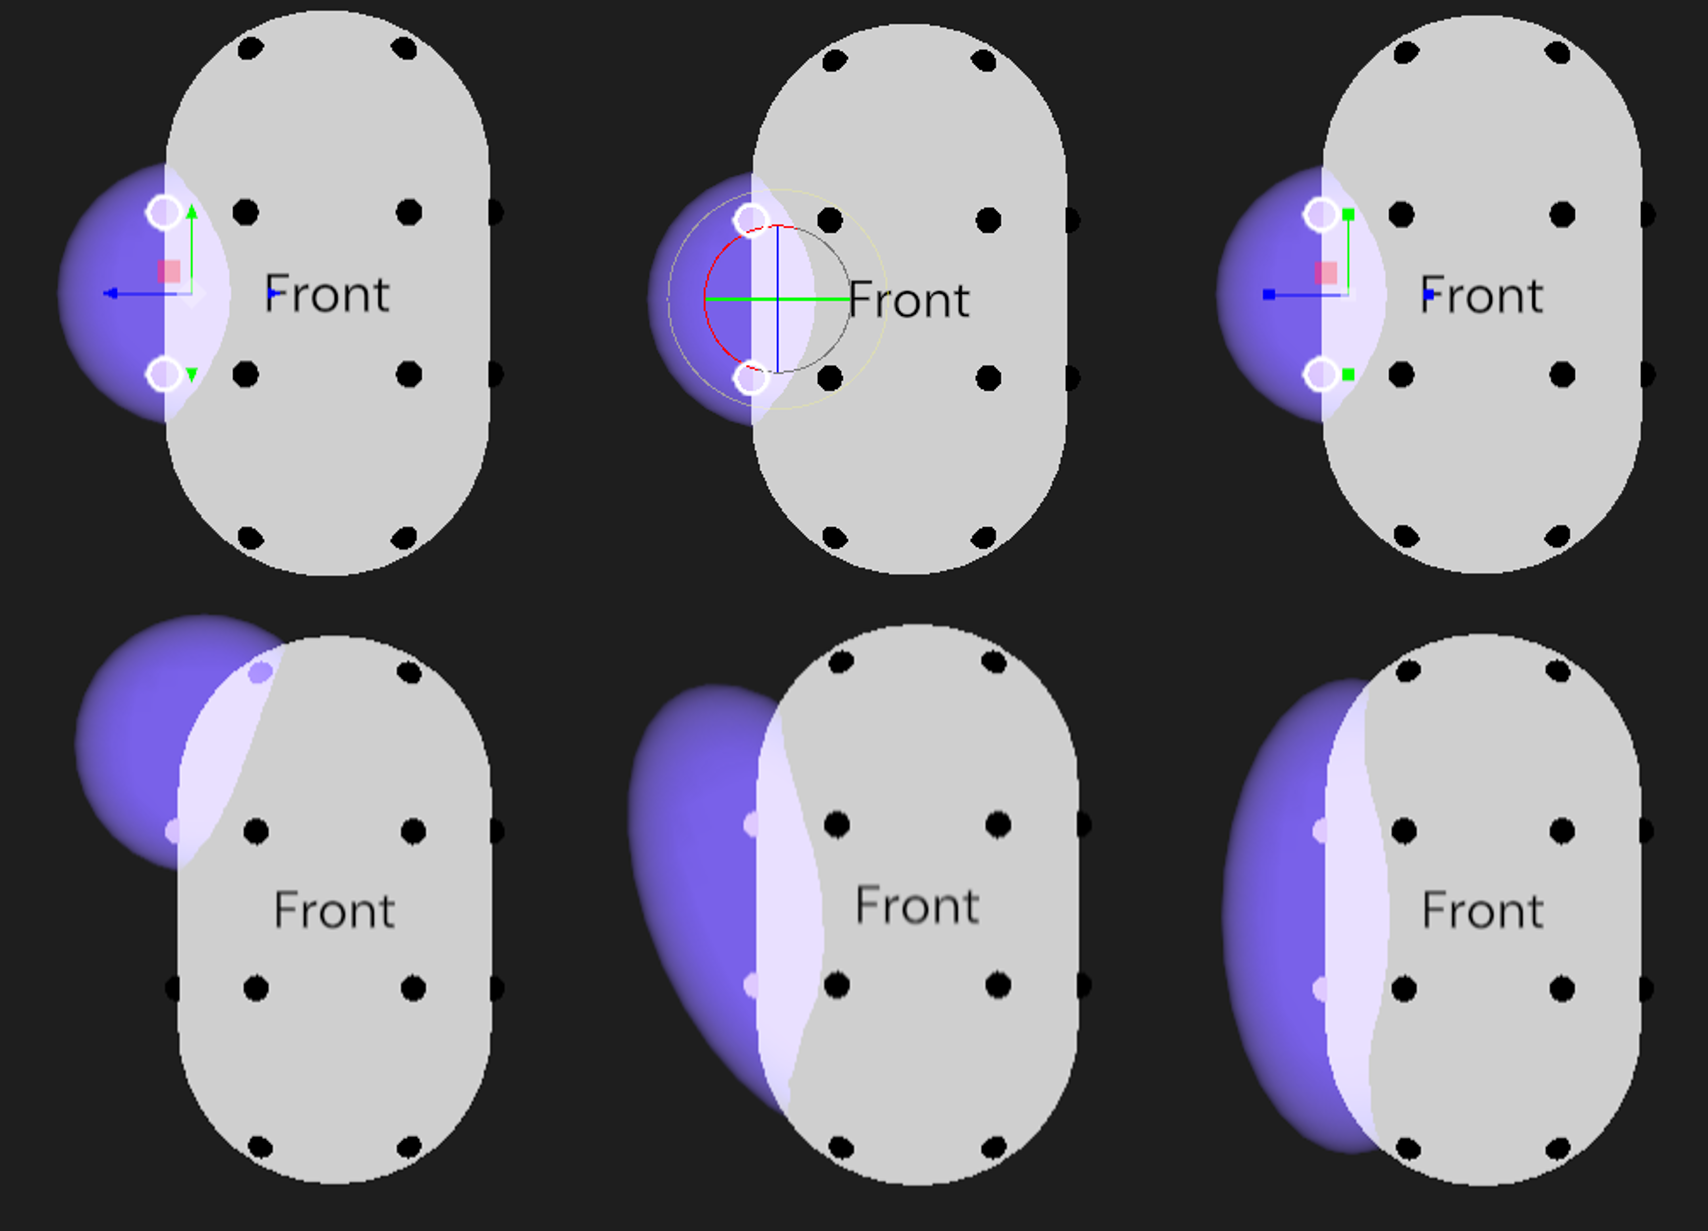
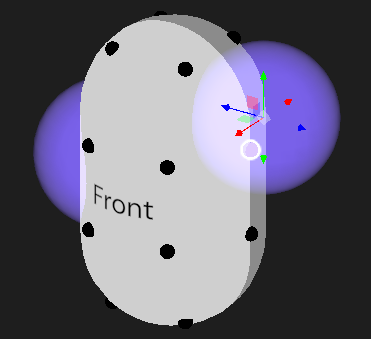
Set shape transformations
A few transformation on shapes are available giving you the tools to play around space and time. Position (W), Rotation(E), Scale(R).
With the corresponding shortcut key, or the associated button, you can modify the selected shape in the desired axis, or precisely control the transformation of the shape by modifying the values directly in the shape panel.
You can also lock the scale factors so that if the user decides to change on value of the scale, the others will modify accordingly. This can also be activated with the CTRL + SHIFT + E keyboard command.
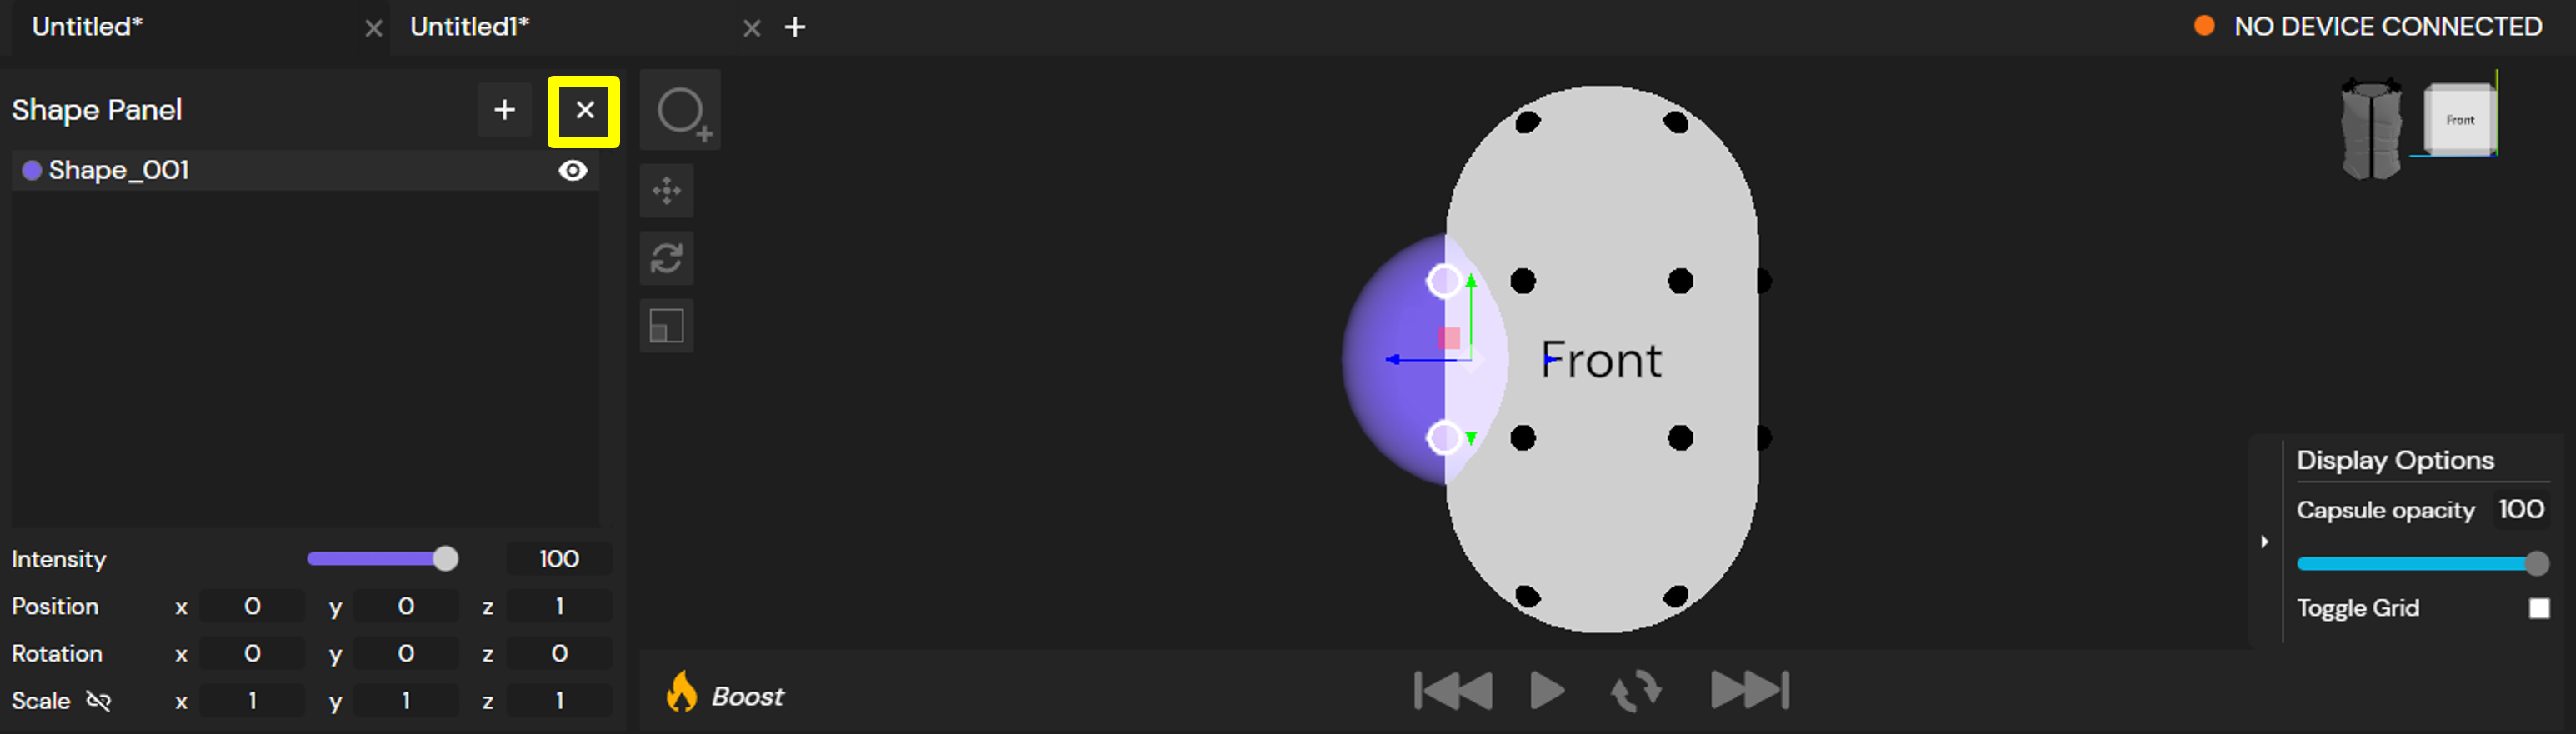
Delete Shape
You can delete a shape by pressing the Delete/Backspace or clicking the delete shape button at the shape panel (highlighted in yellow).
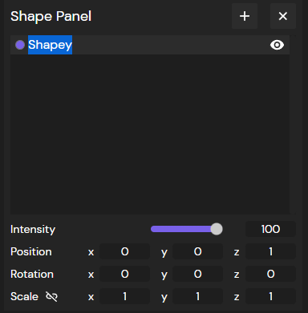
Rename Shape
To change the name of a shape, simply click on it in the shape panel and edit the name, or use the keyboard shortcut Ctrl + Shift + R to quickly rename it.
Copy/Paste Shape
You can copy and paste the shapes once they are selected by using the classic commands Ctrl + C and Ctrl + V. The shapes can be copied and pasted to the same or any other keyframe in the timeline of this or any other effect, as long as it is shape-based.
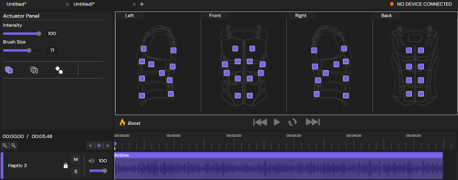
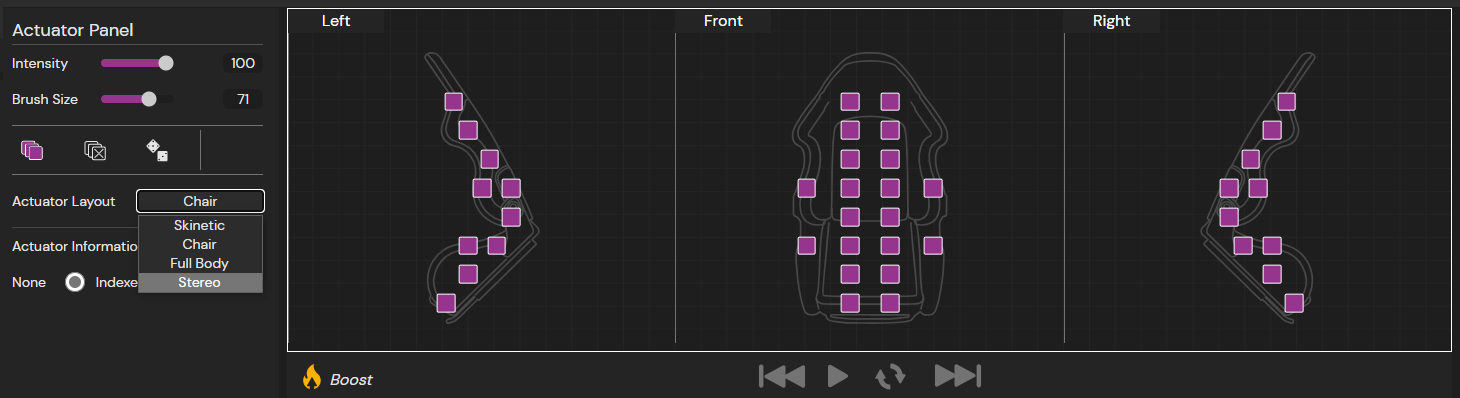
Spatialization with Actuators
Paint actuator weights
To spatialize the sensations on the actuators, you can paint the weights when a keyframe is selected.
Set actuator intensities
You can set the intensity of the actuators depending on the selected views. These operations consist of the following
- Apply random intensities to all actuators: Apply random intensities to the actuators of the selected views.
- Apply intensity to all actuators: Applies the current intensity to the actuators of the selected views.
- Remove intensity from all actuators: Remove the intensity (set the intensity to 0) from the selected views.
If none of the views are selected, the above actions will affect all actuators.
Set intensity
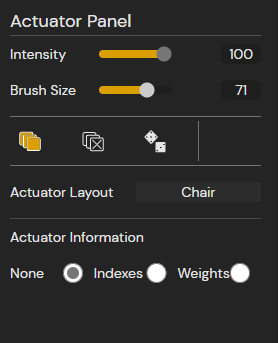
You can set the intensity level through the slider located in the actuator panel.
Set brush size
You can set the brush size through the slider located in the actuator panel.
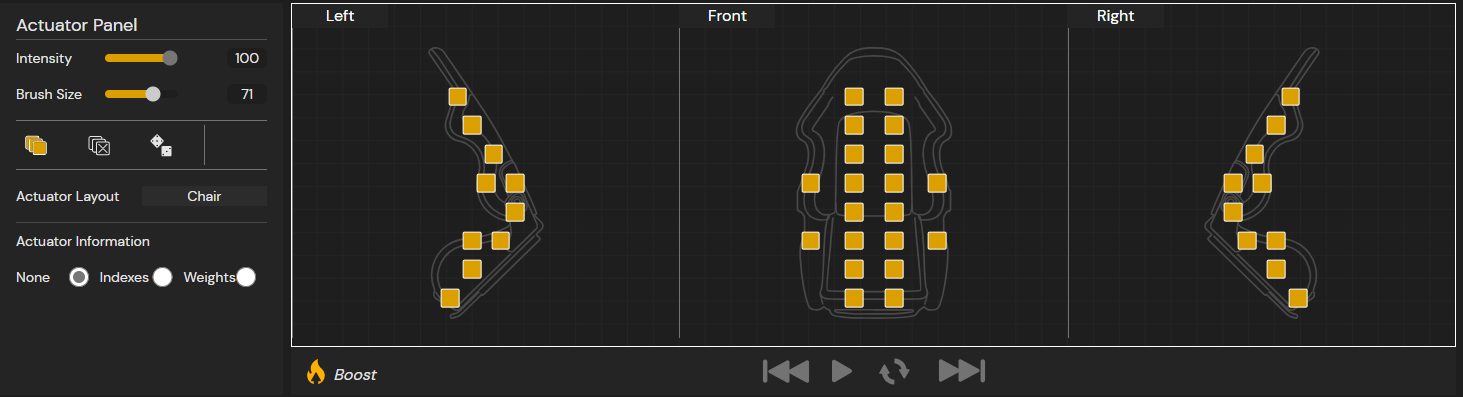
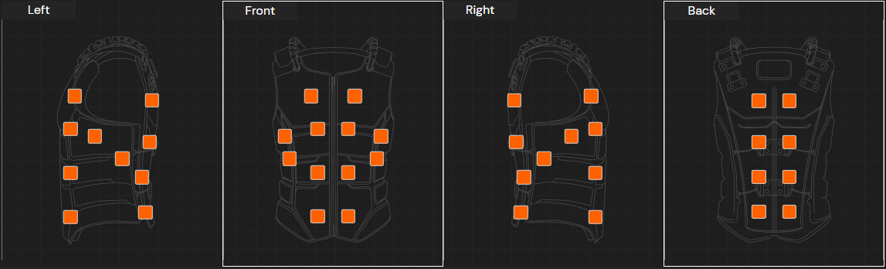
Vest view
You can view the vest on different angles and thus observe where you want to apply the sensation through the given tools.
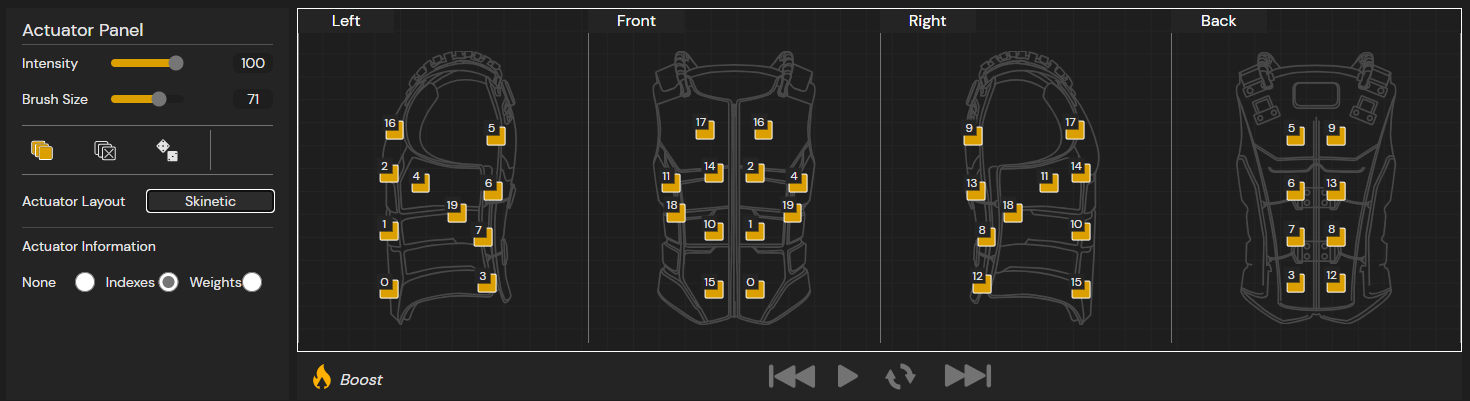
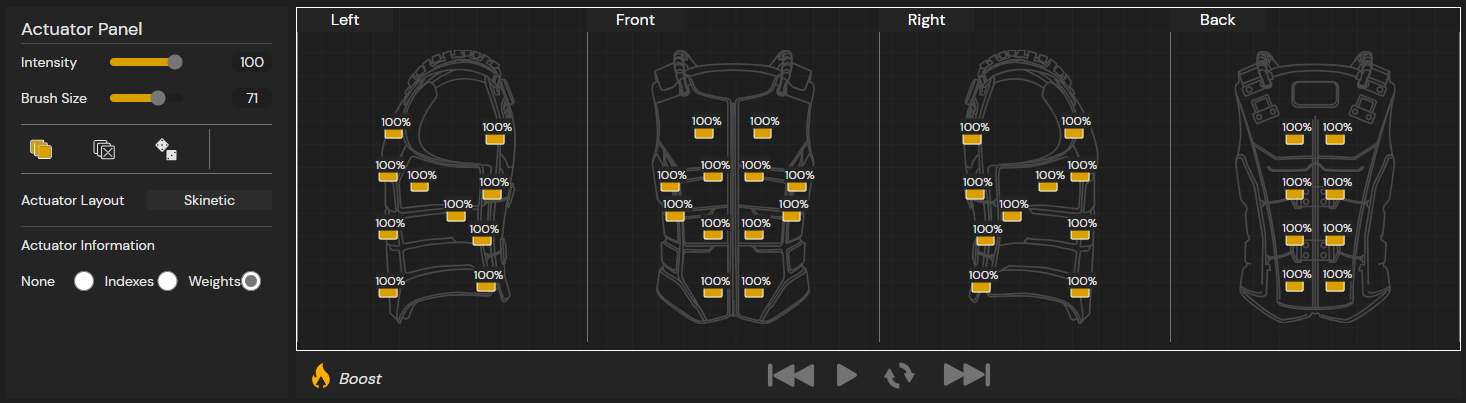
Display layout information
You can now show and hide the actuator numbers and weights for the Actuator-based workspace. You can click on the radio buttons on the bottom of the Actuator Panel to choose the information to be displayed.
You can display the actuator indexes by selecting the Indexes option or by pressing Alt key.
You can display the actuator indexes by selecting the Weights option or by pressing Alt key.
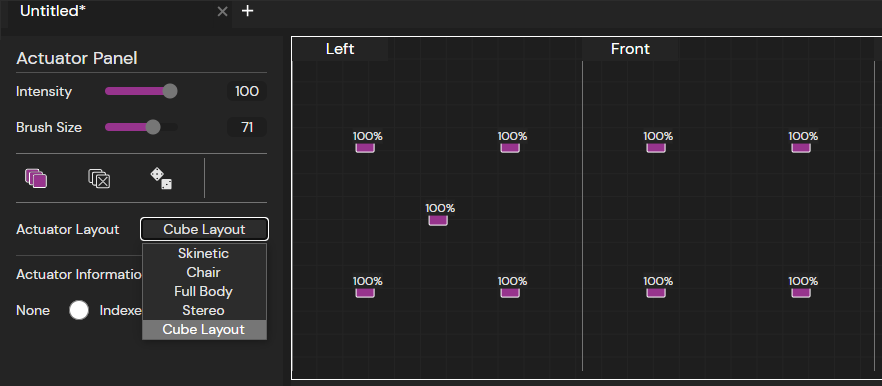
Change the layout
Unitouch Studio allows you to provide an actuator layout, associated with a visual reference, to design with the Studio for your custom device.
We integrate four reference layouts and visual references: Skinetic, a Chair, a Body and a Stereo layout.
Import a layout for custom device
On Edit > Preferences, you can define the default actuator layout that is loaded on application launch. Additionally, you can load your own layouts. To do so, define a folder where the layouts will be stored.
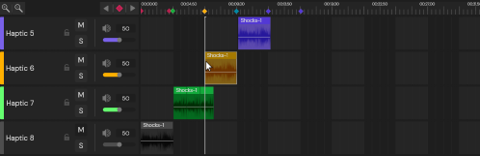
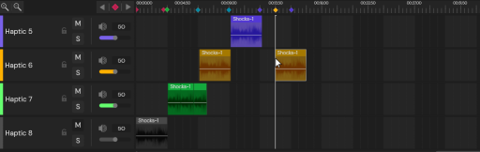
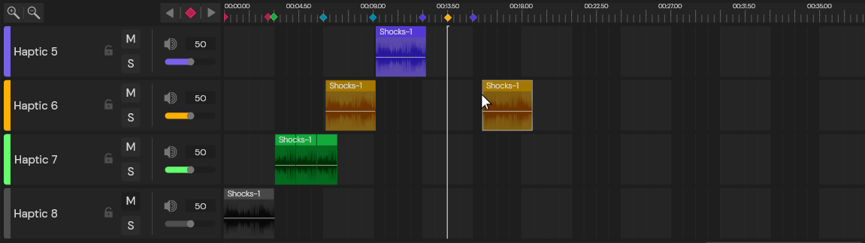
Tracks
Add a track
You can create a new track by placing a sensation below the last track created. Finally, users can also add a track by clicking on the “Add track” button.
Thus, you can design your effects by layering many sensations to fit your expectations.
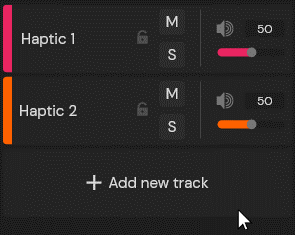
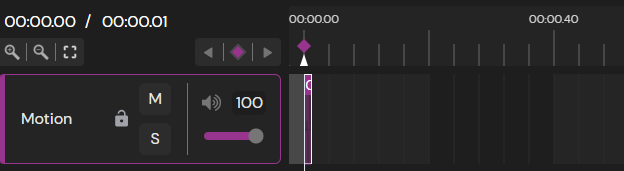
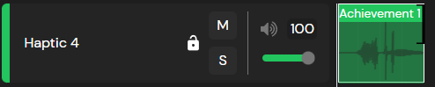
Set Track Volume
Each Track has a volume associated that can you can define to help you harmonize the volume of a track among the others.
Mute Track
Tracks can be muted through the mute (M) button.
This toggle mutes the tracks when activated and unmutes it when deactivated.
Solo Track
Tracks can be also solo-ed through the solo (S) button.
This toggle mutes all tracks except the track it belongs to when activated and unmutes them when deactivated.

Lock Track
Tracks can be locked through the lock button.
This toggle prevents any further modifications on this track if active.

Boost Track
Adjust the sequence boost level to amplify the overall intensity of the haptic sensation. Please note that high values can create artifacts and distortion in the rendering.

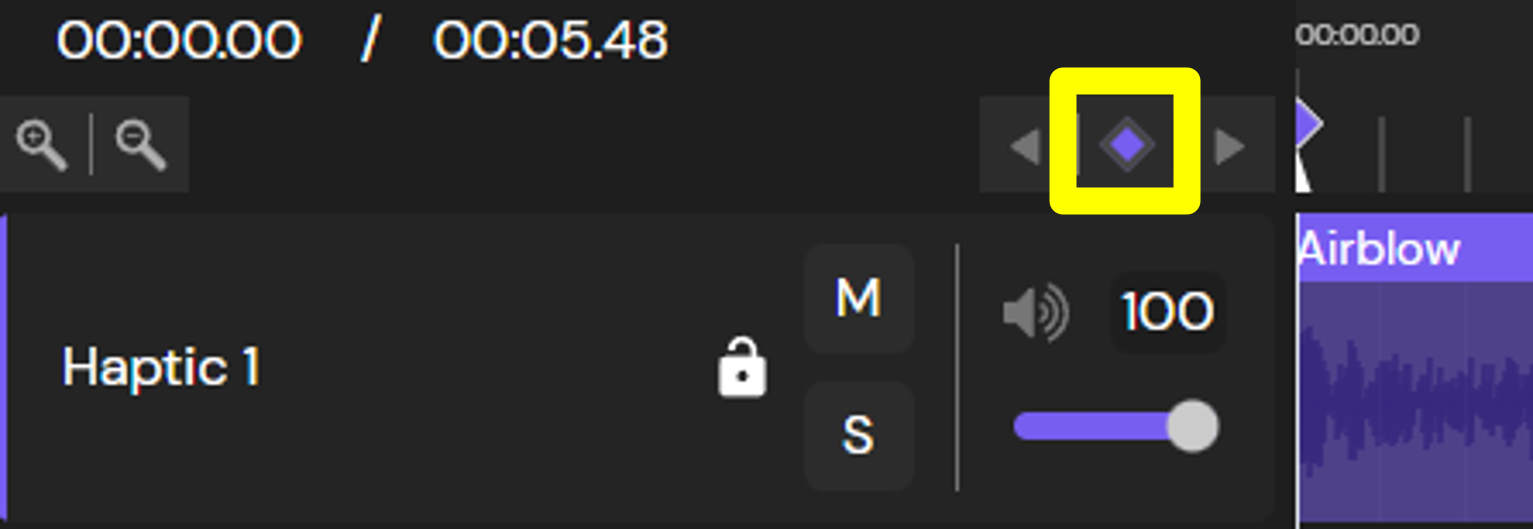
Zooming
Unitouch Studio allows you to zoom-in/zoom-out to properly place your samples in an specific timestamp. There are several ways to achieve this:
Zoom Tools
The Zoom tools will allow you to zoom-in/zoom-out according to the playhead position. This can also be done with the shortcut Ctrl + '+' for zooming-in and Ctrl + '-' for zooming out. ![]()
Zoom In Tool (Ctrl + '+')

Zoom Out Tool (Ctrl + '-')

Ctrl + Mouse Scroll
The Zoom tools will allow you to zoom-in/zoom-out according to the cursor position.
The reframe tool will adapt the zoom level according to your sequence's length.
Reframe Tool
The reframe tool will adapt the zoom level according to your sequence's length.
You can now easily adapt the zoom level according to sequence length by clicking on the Reframe icon. ![]()